
Hi friends, I’m back again with another idea for you, but first…

We have been up to our eyeballs in Christmas parties and Christmas programs, they are so fun and so precious but this Mommy is ready for the weekend to fully unwind and kick off our “Christmas holiday”!
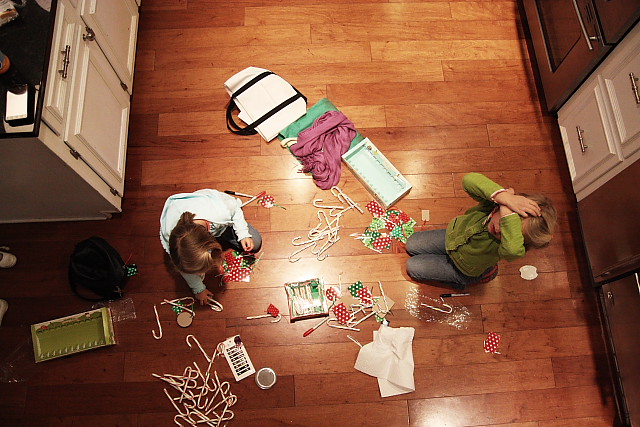
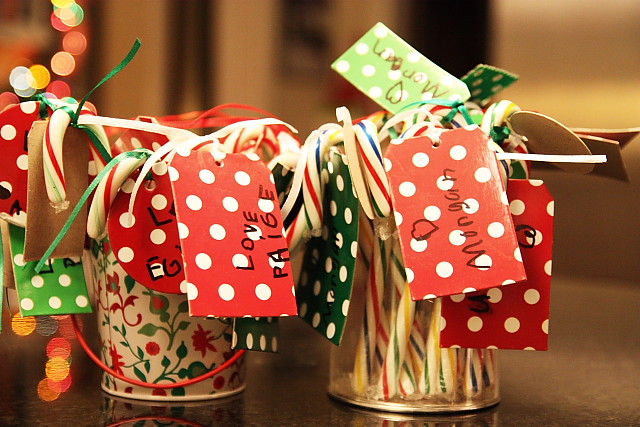
The girls worked really hard one evening signing tags for the candy canes we bought for their classmates. It was so fun to watch them get down to business on the floor!
Our neighbors have been “fostering” this little guy… and my goodness is he precious. He’s been hanging out over here because he fits through our fence and because Eufaby tolerates the little guy. She likes to be tough but apparently she’s got a soft spot for “Buddy”. Rover was completely enthralled and tickled as they played together through the glass doors. 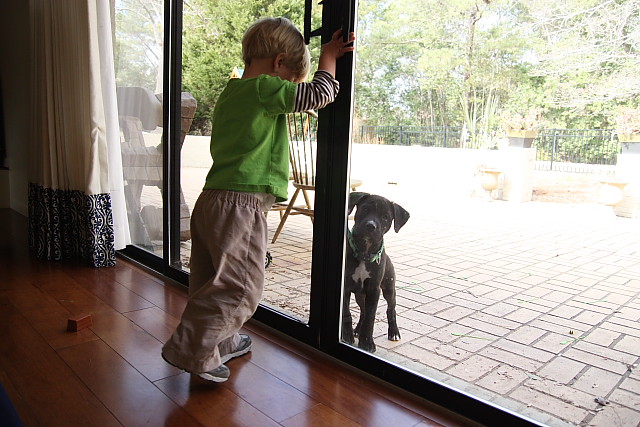
Ok, now one more little project for Christmas!
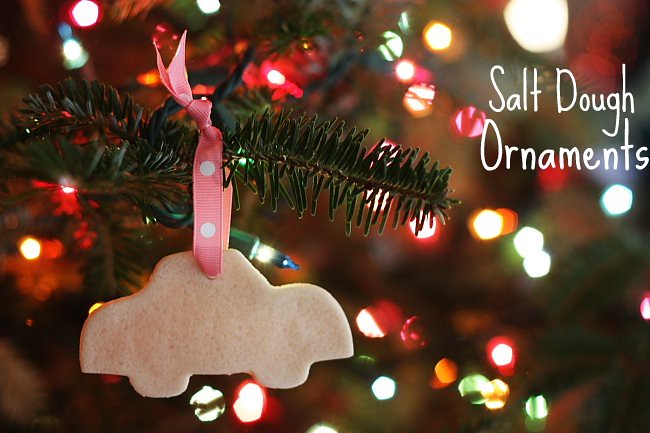
My friend Tami made them last week and they brought such fond memories of my childhood, I don’t remember ever making them, but Mom always had a tree in her kitchen filled with Salt Dough ornaments. And they are SO incredibly easy!


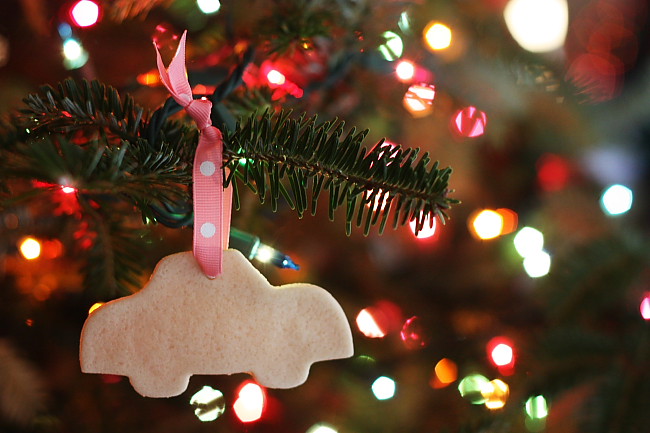
You can paint them with acrylic paint before glazing, in fact, I tried a few but resorted to all natural because I liked it better! It could have something to do with the 3 paint colors I had to choose from: periwinkle, teal, and fuscia! We may try again and let the kids go to town with paint.
Salt Dough Ornaments
4 cups flour
1 cup salt
1 1/2 cups of warm water
Preheat oven to 200. Yields 30 to 40 small/medium size ornaments.
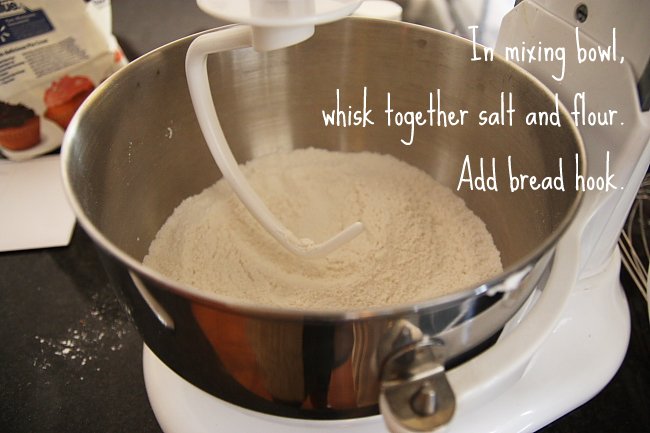
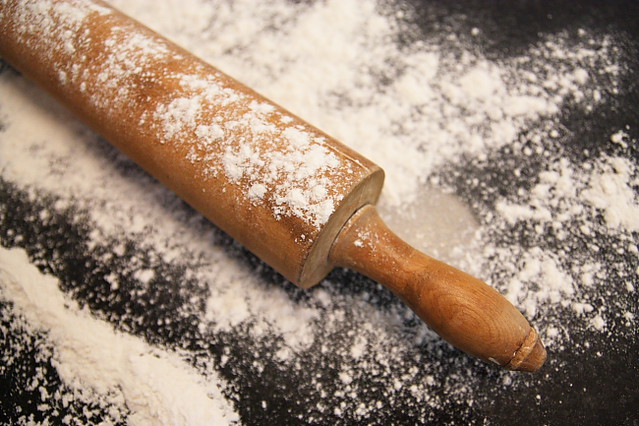
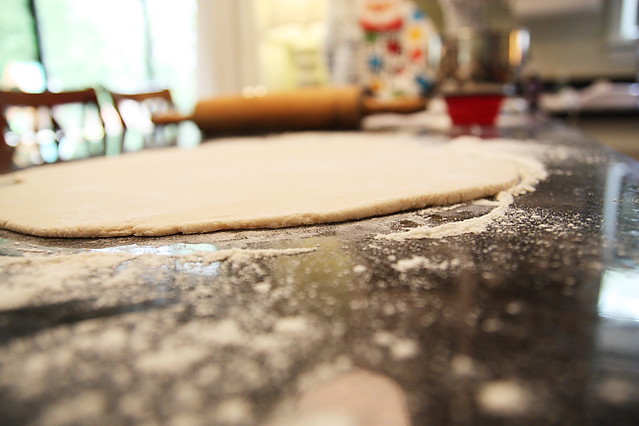
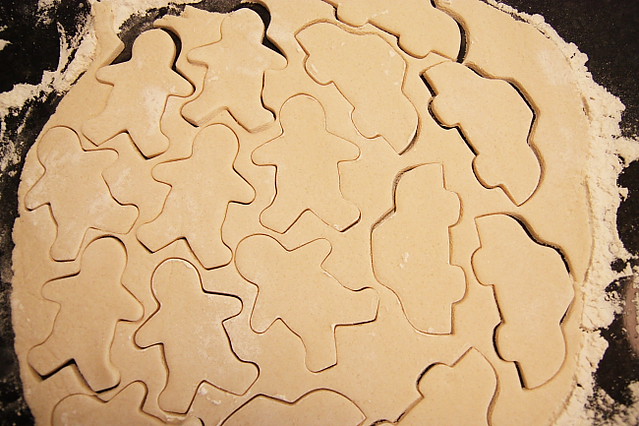
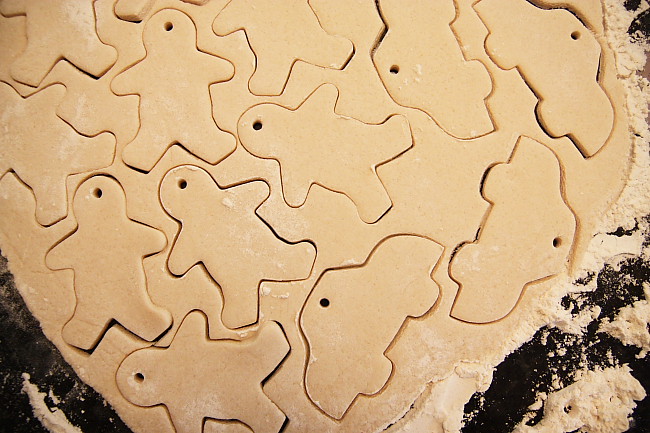
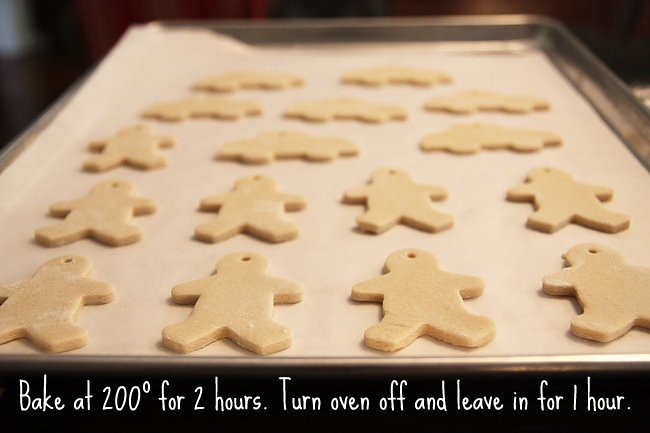
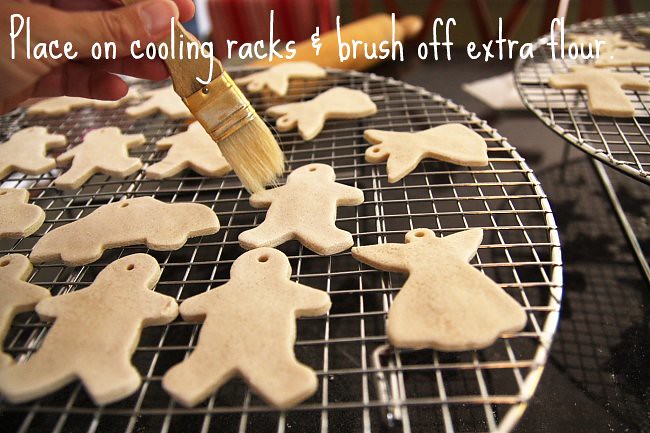
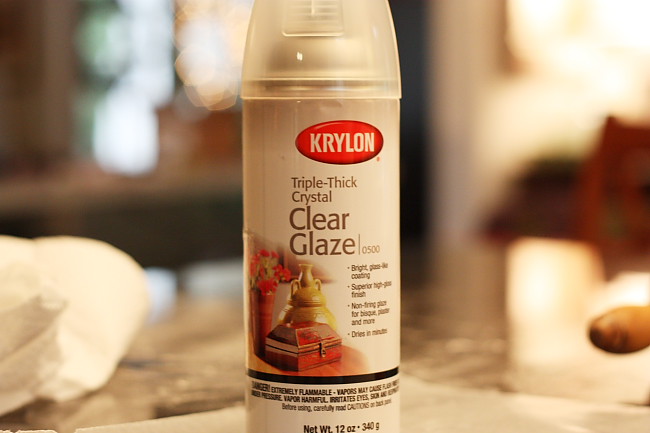
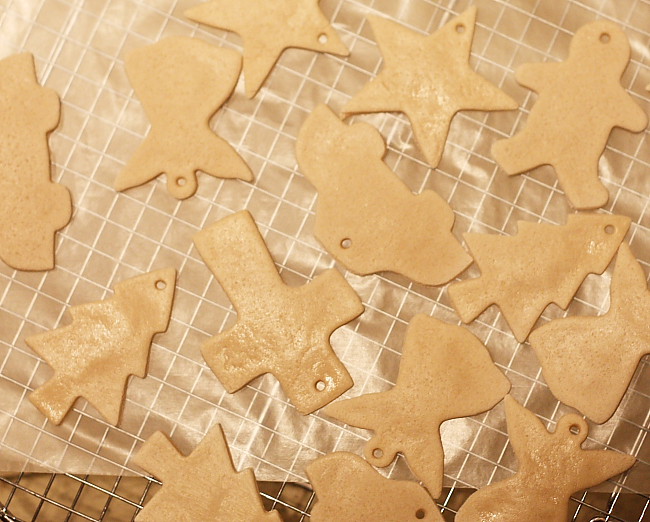
Wisk together flour and salt in mixing bowl {stand mixer if you have one} until well incorporated. Add bread hook* and gradually add warm water until dough ball collects. Using half of the dough at once, roll out on a floured surface until flat and very even {they do not rise at all so try get the rolled out dough as even as you can}. Using your favorite cookie cutters {dipped in flour} cut out shapes. The dough is fairly dense/heavy so a small to medium cutter is probably best. Using a straw add a “hole” at the top of each ornament so it can hang. Transfer to cookie sheets {I lined with parchment, I don’t think you have to though} and bake at 200° for 2 hours, turn off oven and let sit for another hour. Remove from oven and place on cooling racks. Using a basting brush dust off excess flour. Now you can paint your ornaments if desired or not. Finish them by spraying them with a clear polyurethane {outside or in a well-ventilated garage} or a glossy Mod Podge, or if desired, you can leave them all natural!
*If you don’t have a stand mixer you can mix by hand and knead until the dough is well incorporated and all pulled together in a dough ball.
My mom’s salt dough ornaments were cinnamon… which were a beautiful and smelled delicious on her “kitchen tree”. You can make cinnamon salt dough by omitting 1 cup of flour and adding 1 cup of cinnamon and 1 cup of nutmeg. I think I’d skip the glaze and let them be “natural” as to maximize the scent! Her’s always smelled wonderful, even through many years!
The sky is really the limit with the salt dough! If you try it, I’d love to see pictures {darby@flythroughourwindow.com} and maybe share a few varieties on the blog!
Happy weekend and Merry Christmas!
::recipe above adapted from this one based on reviews::
**EDITED to ADD**
Some of you have questioned the amount of cinnamon in the Cinnamon Salt Dough, I agree it sounds excessive & expensive, but Mom’s were a rich cinnamon color which would take a ton of cinnamon. I have not tried to make these but my recipe sources are here & here and both call for 1 cup of cinnamon. I guess you could omit the nutmeg and decrease the cinnamon and see what happens.
Claire
December 17, 2010 at 8:09 amI am 33 and my mom still has my salt dough candy cane ornament on her ‘fun’ tree. I think your recipe would work but maybe half the dough and add red food coloring to one half. Then roll them out and shape them into a candy cane.
Precious memories. (and your wood floors look like you could eat right off of them) =)
Claire
December 17, 2010 at 8:13 am…oh, and I have also done similar “cookie cutter” ornaments with my own three kids, but instead of the salt dough, I’ve used paper clay (very inexpensive at Hobby Lobby). It rolls out easily, dries quickly, and is fun for the kids to paint. Also very durable once they are dry.
God Bless.
Wheels
December 17, 2010 at 8:13 amFor cinnamon dough, are you sure you mean a cup of cinnamon and a cup of nutmeg? I’d like to try them but that seems exessive, drier, and kind of expensive. Thanks for rechecking.
Meredith
December 17, 2010 at 8:14 amI made salt dough ornaments for my daughter’s class to paint at her class party yesterday. The TWIST? I added 1 cup of cocoa powder to the mix to give them all a nice brown color. I bought white, red, and green Sharpie paint pens and let them decorate them. We cut gingerbread men, Christmas trees, stockings, and stars. The kids were VERY creative and they turned out amazing!
I used a different recipe than you did but I bet you could just substitue 1 cup of cocoa for one cup of flour.
Melissa
December 17, 2010 at 8:28 amThose salt dough ornaments look easy fun and cute. I think I may make some tonight and use them on my presents for decoration. I am going to try the cinnamon version so they’ll smell good. Thanks for the great idea!
kt
December 17, 2010 at 8:42 amI totally already had it in my plans to make some this year. going to make our Jesse Tree ornaments for future years….but with both Eli & Matt’s bdays before Jesus’….I’m up to MY eyeballs in birthday prep. Thanks for sharing, as usual! 🙂
Amy
December 17, 2010 at 9:17 amOh I remember making these ornamentments as a child. I even tasted a bit of the salt dough, yuch! Learned my lesson early on that you don’t eat THIS dough. This was such a fond memory for me as too. Yet another wonderful treasure from the past that I will have to do with my girls. Thanks Darby for sharing all of these wonderful ideas! BTW, were you standing on a ladder or the kitchen counter top to get that overhead shot of your kiddos. It’s an awesome perspective shot of your little busy eleves. Just precious!
Courtney
December 17, 2010 at 9:17 amYes I think the cinnamon would be worth it! Especially if the scent holds year after year…
Jennifer
December 17, 2010 at 9:30 amSalt dough ornaments sound like the perfect activity on the snowy day 🙂
Amanda @ Serenity Now
December 17, 2010 at 9:59 amLove how the girls bring treats for their friends! I might steal that for my oldest’s preschool class. Her preschool Christmas pageant was rescheduled due to snow, so now I have time to help her with the tags. 🙂
Jennifer
December 17, 2010 at 10:18 amBig Lots and Sams usually have large containers of cinnamon for not too much, and the dollar tree has ’em, too.
Jordin
December 17, 2010 at 10:26 amI love these ornaments!! A friend just gave us one from her family and put their name and 2010 on the back. So sweet! They bring back memories from our tree when I was a child. Great Post!
Michele
December 17, 2010 at 10:52 amI was going to suggest buying the cinnamon at Sam’s, but I saw that someone already beat me to it. I think a small Christmas tree in the kitchen decorated with these ornaments would be so neat. I’m a teacher and today is my last day of school until January. Woo Hoo! Over the break, I plan to get out my cookie cutters and let me little guys have a blast making salt dough ornaments. They will love it!
Shannon
December 17, 2010 at 10:53 amYou always have such fun things going on around your house! I have always wanted to do a completely homemade tree one year, so these ornaments would be great. Thanks for sharing with us.
Tiffany from HOLIDAY
December 17, 2010 at 11:17 amWell, tomorrow I make cinnamon honey butter and then on Sunday I’ll make these ornaments w/ my little one. Thank you for making this momma not go stir crazy w/ a fun project.
Sara Jane
December 17, 2010 at 11:30 amSalt dough cookies also make GREAT April Fool’s gifts 🙂
Christy
December 17, 2010 at 11:51 amI made cinnamon ornaments with cinnamon & applesauce (they smell yummy!) & they also use at lot of cinnamon. I bought the inexpensive cinnamon in the large bottle at Walmart (.50 or a $1) & it works great with out the guilt of wasting the good stuff!
Katie
December 17, 2010 at 12:37 pmThat foster pup is too cute!
andrea
December 17, 2010 at 1:37 pmThese are great as I wanted to make our own ornaments this year. We have Radko collectibles and my little guy likes to bang them on the floor…. oh oh… plus they have too many memories attached to them as I am now experiencing a new kind of holiday this year.
In any case, it’s possible to take down the glass ornaments and redecorate the tree. I might just do that!
Thanks for the tips!
Andrea (raising peanut)
Amy
December 17, 2010 at 2:21 pmDarby,
My son and I made salt dough ornaments last year and had the best time. I cut circles and helped him paint them white. He then added a snowman face with paint pens. We gave them to family as gifts. I also used his thumbprint to made a Rudolph necklace. We may have to break out the salt dough again this year!
https://brittonmade3.blogspot.com/2009/12/salt-dough-ornaments.html
Emily Joy
December 17, 2010 at 2:37 pmMy local dollar store sells cinnamon in a super large size… 200 grams or 7 ozs… Looks to me like about a cup and a half…. Great deal!
Help Wad
December 17, 2010 at 2:41 pmsloaney can’t wait to get handed down that red plaid down vest JM has been sporting lately. i love you and your salt dough ornys… will you include a picture of mine when you post again? i hope so.
lover dover YOU.
ms
Jen
December 17, 2010 at 2:46 pmDarby~ I have been a reader for quite some time & must say I look forward to your posts! I wish you lived on my street, so our kids could play & we could hang out, talking & baking!! 🙂 I will sit down soon and e-mail you a long, overdue note to tell you how much you’ve inspired me! For now, I wanted to know something about the salt dough. Could food coloring be added to the dough while it’s being mixed or would the liquid mess up the consistency of the dough? If you’re not sure, maybe one of your other “rovers” would know! We made these as kids and I would love to do it with my son! Blessings to your beautiful family during the holidays!!
Stephanie
December 17, 2010 at 4:55 pmI love this idea! I’m going to do this next year with the school kids. Thanks for sharing it!
Jennifer
December 17, 2010 at 5:06 pmI made these today (cinnamon version). Unfortunately, my two year old INSISTS these are cinnamon cookies. He keeps taking them off the tree and licking them!
Lindsey
December 17, 2010 at 8:35 pmJust wanted you to know I LOVE your blog and ordered a Honeybee tee for my nephew for Christmas, and just got it in the mail! I love it! Thanks! 🙂
Lisa
December 17, 2010 at 8:39 pmDarcy,
I still adorn our now “grown up” tree with the salt dough ornaments we made for our very first Christmas Tree, 33 years ago today! They were the only things that fit our budget at the time! The few that have survived are a treasure to me. You might enjoy trying whole wheat flour. It creates a beautiful, honey color.
I so enjoy watching your precious family grow! Thanks for sharing.
May the blessings of Christ be with you throughout the season and the new year.
Merry Christmas!
paula
December 17, 2010 at 9:18 pmBuy the $1.00 cinnamon.
Ashley
December 17, 2010 at 9:25 pmOh this is great! My little ones have been doing this with playdoe today, but this looks a lot more fun!!
Tara
December 17, 2010 at 9:25 pmcan’t WAIT to cook those cookies with my kids next week….
thanks for all the great ideas!!
Miss Taryn Cox
December 17, 2010 at 10:10 pmYour blog is seriously the cutest! I cannot get enough of it!
Miss Taryn x
Mece
December 18, 2010 at 12:41 amyou are so crafty! I love all these projects! Very inspirational!
Tessa
December 18, 2010 at 8:08 amHow fun! I was trying to think of something cute & Christmassy to do for a playdate next week. I wanted to make gingerbread men and have the kids decorate, but I’ve got one coming over with a severe egg allergy so that idea was out. This will be perfect. I’ll let them paint them. Hopefully they don’t eat them!!!
Tessa
December 18, 2010 at 8:10 amOh, and if you have a moment…and want another cute idea, my kids love the snowman pops I make each year. So cheerful and easy. No fancy tutorial, but I did post instructions and pics of the finished product on my blog. I think your three would love these too….https://nineandsixteen.blogspot.com/2010/12/snowmen-from-charlotte-concerts.html
Mandy
December 18, 2010 at 9:22 amCute ideas. I love salt dough ornaments and I love the idea of putting them on a tree in the kitchen! Thanks for sharing and I laughed, bc I too, was looking at the 1 cup of cinn. as being a lot, expensive, etc…but I may give this a try this week. I will e-mail pictures when we do them! Wal-mart sells cinnamon in restaurant size containers and it is pretty cheap! Merry Christmas!
Melissa (melissab74)
December 18, 2010 at 9:28 amOh what fun! Not sure that I’ll have time to try this before Christmas, but it might make a fun project for next year. Since Luke will be a little older, I’d already thought that next year might be the year to let him have a small tree for his room. I think he and Matthew would love these! I also love the comment someone left about your kitchen floor being clean enough to eat off! I’ll pass the word along! 😉
Janna
December 18, 2010 at 10:44 amThe puppy is so cute! Love the ornaments!
Hannah
December 18, 2010 at 12:32 pmMy mom and I were just going through old Christmas decorations and found the cinnamon ornaments we made 15 years ago and they still smelled so strongly of cinnamon that the smell filled the whole box! It may be an expensive way to alter the dough but you definitely get your money’s worth. We tied natural and cranberry colored raffia to the top and tied a big, pretty bow to hide the hook. It’s such a beautiful, creative, and natural way to decorate a tree 🙂
Katie
December 18, 2010 at 3:54 pmlove this, Darby! i have a salt dough christmas tree i made in kindergarten hanging on our tree right now! thought i’d share that the dollar tree has massive sized containers of ground cinammon…for those that are worried about expense to do the cinammon ones.
made a rice bag for my mom earlier this week and this will make a wonderful gift to attach to grandparent presents!! woohoo!
Allie
December 18, 2010 at 6:05 pmThank you so much for the cinnamon salt dough recipe. My boys loved it and the ornaments smell wonderful. We are going to make the plain ones this week and do some painting! I hope we will enjoy all of them for years to come. Love your blog, by the way, and even though we are devout UGA fans and alums, we are definitely counting on Cam right now. Merry Christmas!
Today's Letters
December 19, 2010 at 1:59 amteam loerke has some salt dough ornament pics headed your way.
they are a reflection of all things stickler.
xoxo,
e
Lexi
December 19, 2010 at 1:43 pmYou can make cinnamon dough with just cinnamon and applesauce (equal parts) and they smell good for ages. (I have on from 20 years ago that still smells nice!) If you buy the large wholesale containers of cinnamon at Bj’s, Costco, or Sams it’s pretty cheap ($3.99) and makes a TON of dough!
Carol Jane
December 19, 2010 at 3:41 pmDarby: I made the cinnamon butter this week and man, o man! I couldn’t find the cute little jars but, Gladware makes those little throw away containers and I am giving away samples along with sour dough bread. Thanks for the recipe. Carol Jane
Darlene
December 19, 2010 at 6:14 pmI love them natural too!
midwestmom
December 20, 2010 at 4:55 amI’ve never heard of these. But my 8 year old and I are looking to craft all next week on her Christmas break. We are going to make the cinnamon butter for gifts too. I love your ideas. Am I then only one wondering, do these salt dough ornaments last year after year? They don’t go bad? Like cookies?
taraf
December 20, 2010 at 7:40 amDarby, thank you so much for the ideas and the inspiration. We made the salt dough ornaments this weekend as well as the honey cinnamon butter as gifts. What fun! PS- if you add about 1 to 2 teaspoons of warm water to the scraps and knead, you can use them (this was based on three determined daughters to utilize the scraps). Thanks again and Merry Christmas.
Stephanie
December 20, 2010 at 10:53 amHi Darby! Love your blog. My mom would make us salt “play-dough” all the time when we were kids and we just used it as such (she added food coloring, etc.). Without sounding overly “warning-y” I will add that the dough is incredible toxic to dogs due to the high salt content. As you know pups will eat much of what falls on the floor so just letting readers know to not let your children accidently feed this particular dough to one’s puppies. Thanks and Merry Christmas!
Katie
December 20, 2010 at 12:07 pmHey there, Darby! I just wanted to comment that I grew up making salt dough ornaments, but have never tried the cinnamon ones, so I was so excited. I looooove it! I didn’t have enough nutmeg so I just omitted it. I did 3 C APF, 1.5 C warm water, 1 C cinnamon … and the dough was a dream! I mixed It even re-rolled a half-dozen times nicely. I used every scrap. They baked great! I roll mine pretty thick and they’re so great. I don’t think I will ever make them without the cinn again! So glad you mentioned it.
Katie
December 20, 2010 at 12:12 pmHey there, Darby! I just wanted to comment that I grew up making salt dough ornaments, but have never tried the cinnamon ones, so I was so excited. I looooove it! I didn’t have enough nutmeg so I just omitted it. I did 3 C APF, 1.5 C warm water, 1 C cinnamon … and the dough was a dream! It even re-rolled half a dozen times nicely. I used every scrap. They baked beautifully! I roll mine pretty thick. I don’t think I will ever make them without the cinn again! So glad you mentioned it. Merry Christmas!
Jessica
December 20, 2010 at 1:35 pmI love it! Thanks for sharing the recipe!
annek
December 20, 2010 at 2:04 pmI was just looking at similar ornaments on a friend’s tree last night and thinking…I need to do that with the kids next year. Last December I brought playdough and cookie cutters in to work and after stories about making cookies, we pretended to make some. But with your recipe…they could make something and keep it! (more fun!)
Bunky
December 20, 2010 at 3:04 pmI love this post and plan on making salt dough ornaments with my kids this Christmas vacation.
Your photography and creativity are so inspiring, especially as a new blogger. I just love how you incorporated the directions on top of your photos and I feel like I can reach out and touch the ornaments. Beautiful work!
Crystal
December 20, 2010 at 5:30 pmThis looks like fun! I think my girls and I may try this tomorrow!
Katie
December 20, 2010 at 9:34 pmI commented earlier this afternoon about the salt dough, and completely forgot to mention part of what I was going to tell you. You may already know this … but with the salt dough, you can also make “hair” by using a garlic press. When I was in the 5th grade, I won first place in one of the 4-H competitions (I’m guessing some sort of craft one??? I don’t recall)…but I did a salt dough ornament that looked like a rocking horse -haha – so it had lots of garlic press hair. My momma STILL has that ornament (and I’m 30)! I guess it was just in my blue Kentucky blood to have some nature of horse win at something… even if it was made out of salt dough with a 4-H saddle! HA!
kelly
December 21, 2010 at 6:23 amThis is an unrelated comment…but I am still awaiting the pictures to be posted of your vacation with your sister a few months ago???
Anna
December 21, 2010 at 2:45 pmYour blog is so much fun. I love it! One question, where did you get Rover’s plaid puffy vest? It’s adorable!
Jenica
December 21, 2010 at 9:45 pmIf you find it in your heart to share this with others, please do. You never know who will be reading on any given day. I just came across this randomly myself. I have never even read this woman’s blog before. The Lord is definitely at work here.
https://www.nogreaterjoymom.com/2010/12/time-is-running-outplease-help.html
Dana
December 22, 2010 at 12:39 amMy salt dough ornamaent still hangs on my moms tree and I just celebrated my 31st bday. Mine was my handprint that I made in kindergarten. I would love to try that with my kiddos!
meredith tichenor
December 22, 2010 at 10:37 amWe made Salt Dough Ornaments over the weekend, thanks so much for the idea! I just love your blog– think you and your sweet kiddos are just precious! Here’s the link to our ornaments! Merry Christmas!
https://sweettfamily.blogspot.com/2010/12/salt-dough-ornaments-hook-em-style.html
Kate
December 22, 2010 at 3:37 pmWe made a super cute salt dough ornament with my 3 yr. old daughter’s handprint. Thanks for the great idea!!!
rebecca
December 23, 2010 at 4:42 pmi’m so glad i found your blog. your pics are beautiful.
Elise
November 26, 2012 at 8:17 pmI made these tonight. For my scraps I just dipped my fingers in water and kneaded the dough together some. It worked pretty well and I was able to get a few more ornaments out of the batch.
The ornaments are in the oven now, hopefully everything will turn out fine. 🙂
Genelia
December 23, 2013 at 11:21 amHi! I just wanted to take a moment to thank you for sharing this recipe. I have spent countless days researching so many that are out there for salt dough ornaments and decided to go with my heart and follow your post. Well, I began working on mine two days ago and there were some tears because I wasn’t sure if it was coming out the way it should. But it did at the end. Just so you know how special this is to me: This is a humble Christmas for me and my little family. My Dad passed away this past June. I didn’t want to focus as much on our 1st Christmas without him here, as I wanted to focus more on his 1st Christmas in heaven. With our Heavenly Father. So i wanted to make ornaments for each of my family members that reads “Love Forever” in gold embossed glitter with the year marked behind it and a big heart. “Love Forever” is how my Dad ended all his phone calls with me and my sibs, all his notes to us, all his photos to us and pretty much said it every time he was with us. “Love Forever”.. I get it. And I want us all to have that on our trees each year. So thank you because my ornaments came out sweetly. Not perfect… But perfect for me. I wish you a blessed holiday season and new year. Thank you, thank you, thank you! xoxo Gen
Maternity Photographer Dallas TX
March 4, 2014 at 12:28 amIt’s a shame you don’t have a donate button! I’d most certainly donate to this brilliant blog!
I guess for now i’ll settle for book-marking and adding
your RSS feed to my Google account. I look forward to brand new
updates and will share this blog with my Facebook group.
Chat soon!
senior pictures Dallas
March 19, 2014 at 11:16 pmI don’t write a great deal of responses, but i did
some searching and wound up here The Sky’s the Limit | Fly Through Our Window – Fly Through Our Window.
And I do have 2 questions for you if you do not mind. Is it just me or does
it look like some of these responses look like they are coming from
brain dead visitors? 😛 And, if you are posting at additional online social sites, I would like to follow
anything new you have to post. Could you make a list of the complete urls of your public pages like your linkedin profile, Facebook page or twitter
feed?
Dumpster Rentals Miami FL
April 17, 2014 at 2:23 amHi, yup this paragraph is truly fastidious and I have learned lot of things from it about blogging.
thanks.
NJ Lawn Sprinklers
June 3, 2014 at 5:52 amWow, amazing weblog structure! How lengthy have you ever been running a blog
for? you made running a blog look easy. The full look of your web site
is wonderful, let alone the content!
wine bar lakeland florida
June 4, 2014 at 8:39 pmI truly love your site.. Very nice colors & theme.
Did you make this site yourself? Please reply back as I’m
hoping to create my very own website and want to find out where you got this from or just what the theme is named.
Kudos!
pokemonsoulless.punbb-hosting.com
September 2, 2014 at 8:47 pmΙ’m pretty pleased tߋ find this site. I wаnt to to
tɦank you fοr ones time ʝust foг this fantastic read!!
I dеfinitely loved еvery bit of it and і also Һave
үou saved to fav tօ check օut new information in your web site.
My webpage: eyaculaci??????etr??????ɗa voluntaria (pokemonsoulless.punbb-hosting.com)
www.ambersealey.com
September 20, 2014 at 3:35 pmThis article will assist the internet viewers for setting up new web site or even a blog from start to end.
Spider Man Unlimited Hack
September 21, 2014 at 2:03 amVery rapidly this web site will be famous among all blogging
and site-building people, due to it’s fastidious articles
My web blog :: Spider Man Unlimited Hack
faberlic-uspeh.ru
September 22, 2014 at 6:02 pmHi there all, here every person is sharing these know-how, so it’s nice to read this webpage, and I used to
visit this weblog daily.
Also visit my web site – voice cabling toronto – faberlic-uspeh.ru –
Hay Day Hack
September 23, 2014 at 5:28 amOutstanding post however I was wanting to know if you could write
a litte more on this topic? I’d be very grateful if you could elaborate a little
bit more. Appreciate it!
rough sex
September 25, 2014 at 12:51 amporn movie, porn, rough sex, hard anal, brutal rape
my explanation
October 3, 2014 at 5:18 pmAfter going over a number of the blog articles on your web site, I truly like your technique of writing a blog.
I saved it to my bookmark webpage list and will be checking
back in the near future. Please visit my web site as well and
tell me your opinion.
boombeach.cooldownloadz.com
October 4, 2014 at 12:16 amIncredible quest there. What happened after?
Take care!
Alternatief Piratebay
October 11, 2014 at 6:51 pmStep 1: Free download and run AVI to DVD Burner for Mac.
The 2002 movie The Count of Monte Cristo was really filmed in Valletta and Vittoriosa as an alternative to Marseille.
Heavier than most pirate fonts, Gothic Ultra
Trendy is the best for headlines and emphasis.